Adding and Editing Commercials
Commercials (adverts) are divided into three types:
1. Video;
2. Image;
3. Text.
The type of commercial is determined at the stage of its creation. To create any type of advert, click  .
.
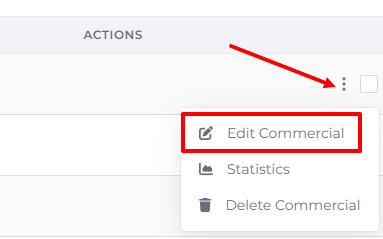
To edit or delete an added advert, click on the action menu to the right of it and select the appropriate item:

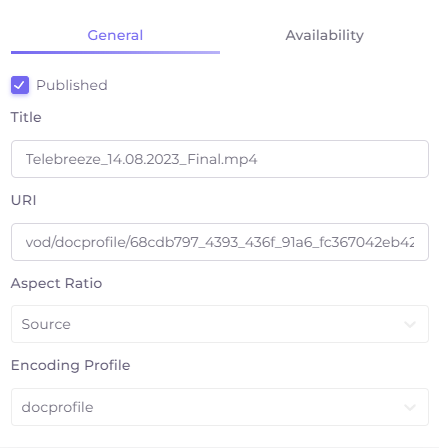
The Add/Edit Commercial window consists of 2 tabs: General and Availability.
General Commercials settings
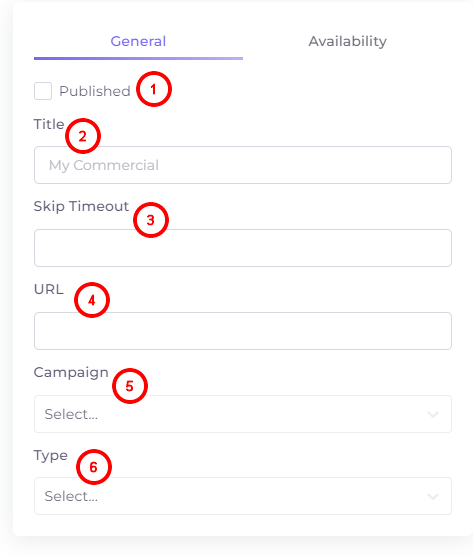
- Published - run the commercial to the access of users (subscribers).
- Title - the name of the commercial displayed in the list of commercials.
- Skip Timeout - the time interval in seconds from the start of displaying the commercial in the player to the possibility to close it.
- URL - the page the user will be taken to when clicking on the commercial.
- Campaign - whether the commercial belongs to a campaign. You can read about campaigns here.
- Ad type: video, image or text. After selecting the type of commercial, additional settings will open.
Below we will tell you about the peculiarities of working with different types of commercials.
Commercial Video Sources
A video can have one or several sources.
The fields for adding a video source are opened after selecting the appropriate commercial type and clicking on  .
.
Video source edit fields will open by clicking on the action menu to the right of the commercial in the list:
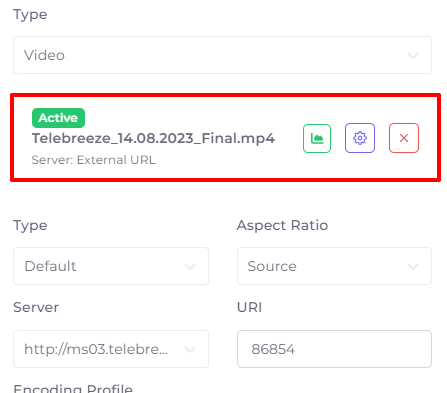
Three options can be used as a video file source:
- Downloading the video file from the Telebreeze server.
- Direct link to the video source.
- Adding a video file directly in the source settings window.
Here's how the fields for creating a new source work.

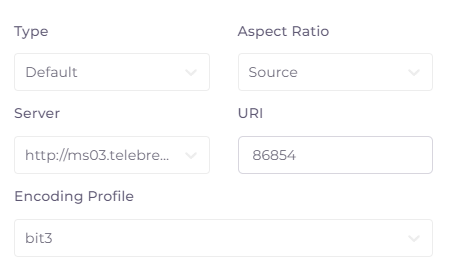
Aspect Ratio: defaults to source, but can be adjusted to fit the screen size in the subscriber's application: fit, stretch or crop.
Source - does not apply any settings.
Fit - fits existing content into the screen at its maximum length. The video proportions are preserved, the video is not cropped. Free space is filled with black color.
Stretch - stretches the image to fit the screen. Video proportions are changed, the video is not cropped.
Crop - Fits the image to the shortest length. Video proportions are preserved, excessive video information is cropped.
Server: Select the server where the content is hosted. Once the server is selected, you will be prompted to select an Encoding Profile. A URI (resource identifier) window will be added. It should be filled in automatically.
To add a file, click or drag a file to the Add File field:

To add a direct link to a source, leave the “Server” field with “External URL” content and fill in the URL field.
Click  and it will appear as a block above the fields for adding a source.
To delete a source, click the cross  to the right of the source.
Advanced Video Source Settings
Advanced source settings can be accessed via the action menu on the right side of the commercial bar --> Edit Commercial --> the gear icon in the source block.

The editing window that opens when you click this button contains two tabs: General and Availability.
- General
Published - enable or disable the source to work in applications.
Title - arbitrary name of the source. By default it corresponds to the URL of the source.
URI - resource identifier.
Aspect ratio: by default as in the source, but can be adjusted to fit the window size in the application: fit, stretch or crop.
Encoding profile - select the type of script to decode video on demand from the server. The setting will appear only for editing a source located on the Telebreeze server.
- Availability - customizes the availability of the source by time, geography and platforms.
Available from - date and time of source activation (by default indefinitely);
Available To - date and time of source deactivation (by default indefinitely);
OS - operating systems in which the source will be available;
Geo IP - selects the geographic restriction rule. The rules are set in the Operator menu.
To delete the contents of the date and time line, click on the cross to the right of it:
Adding and Editing Banners
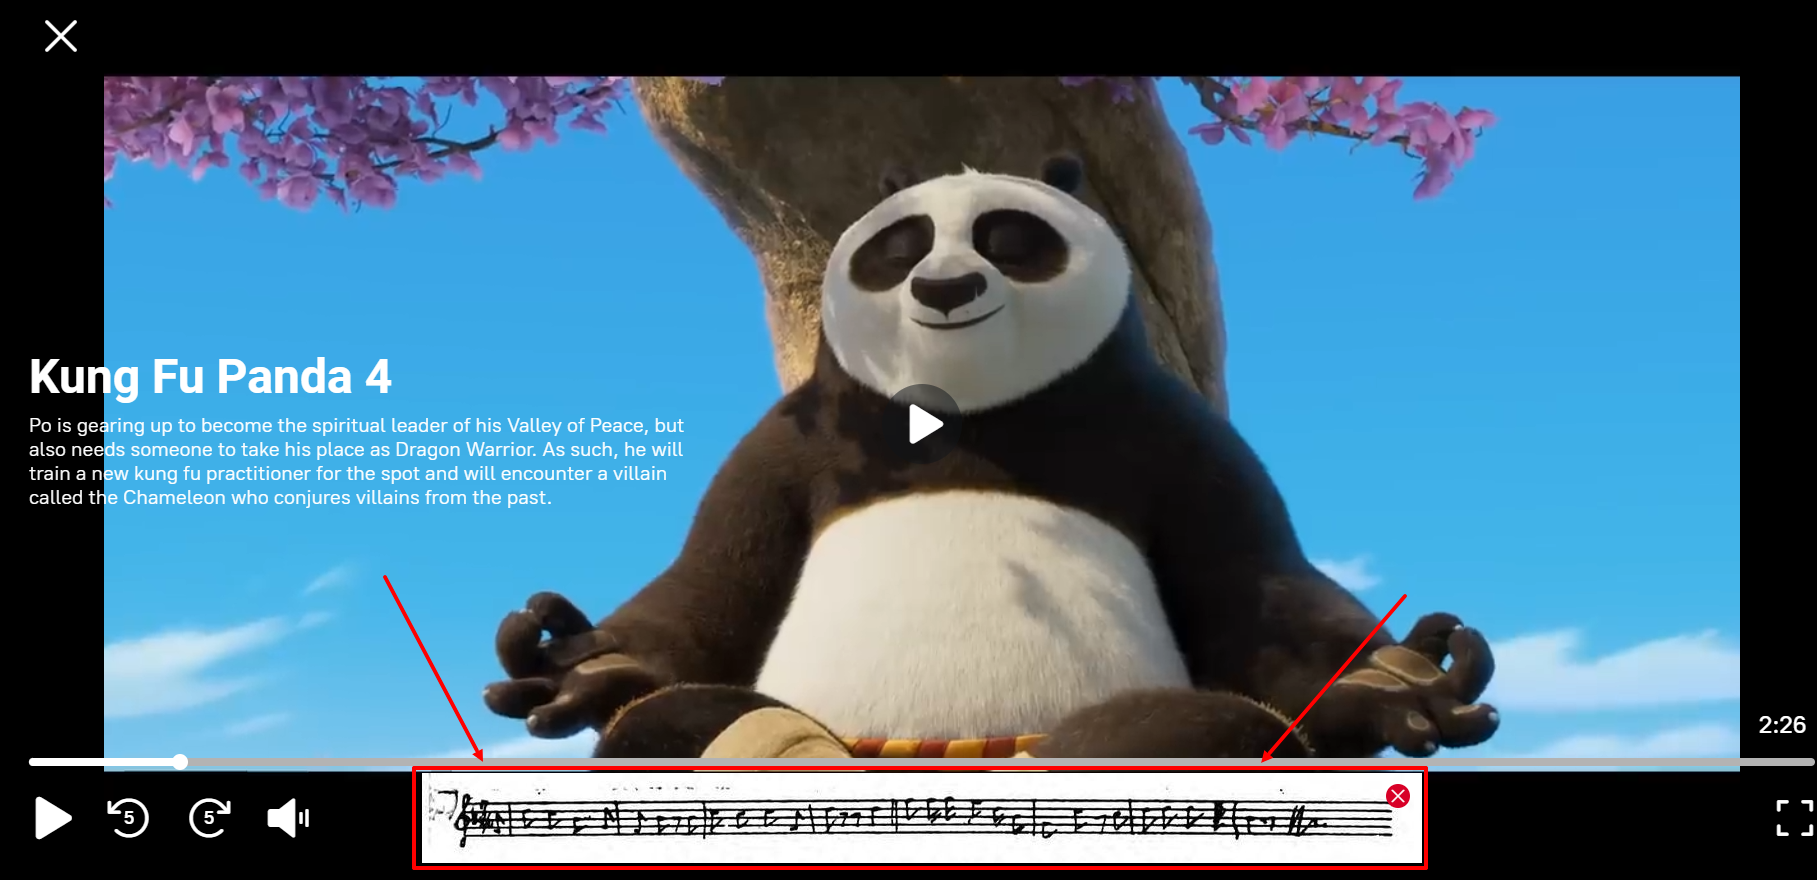
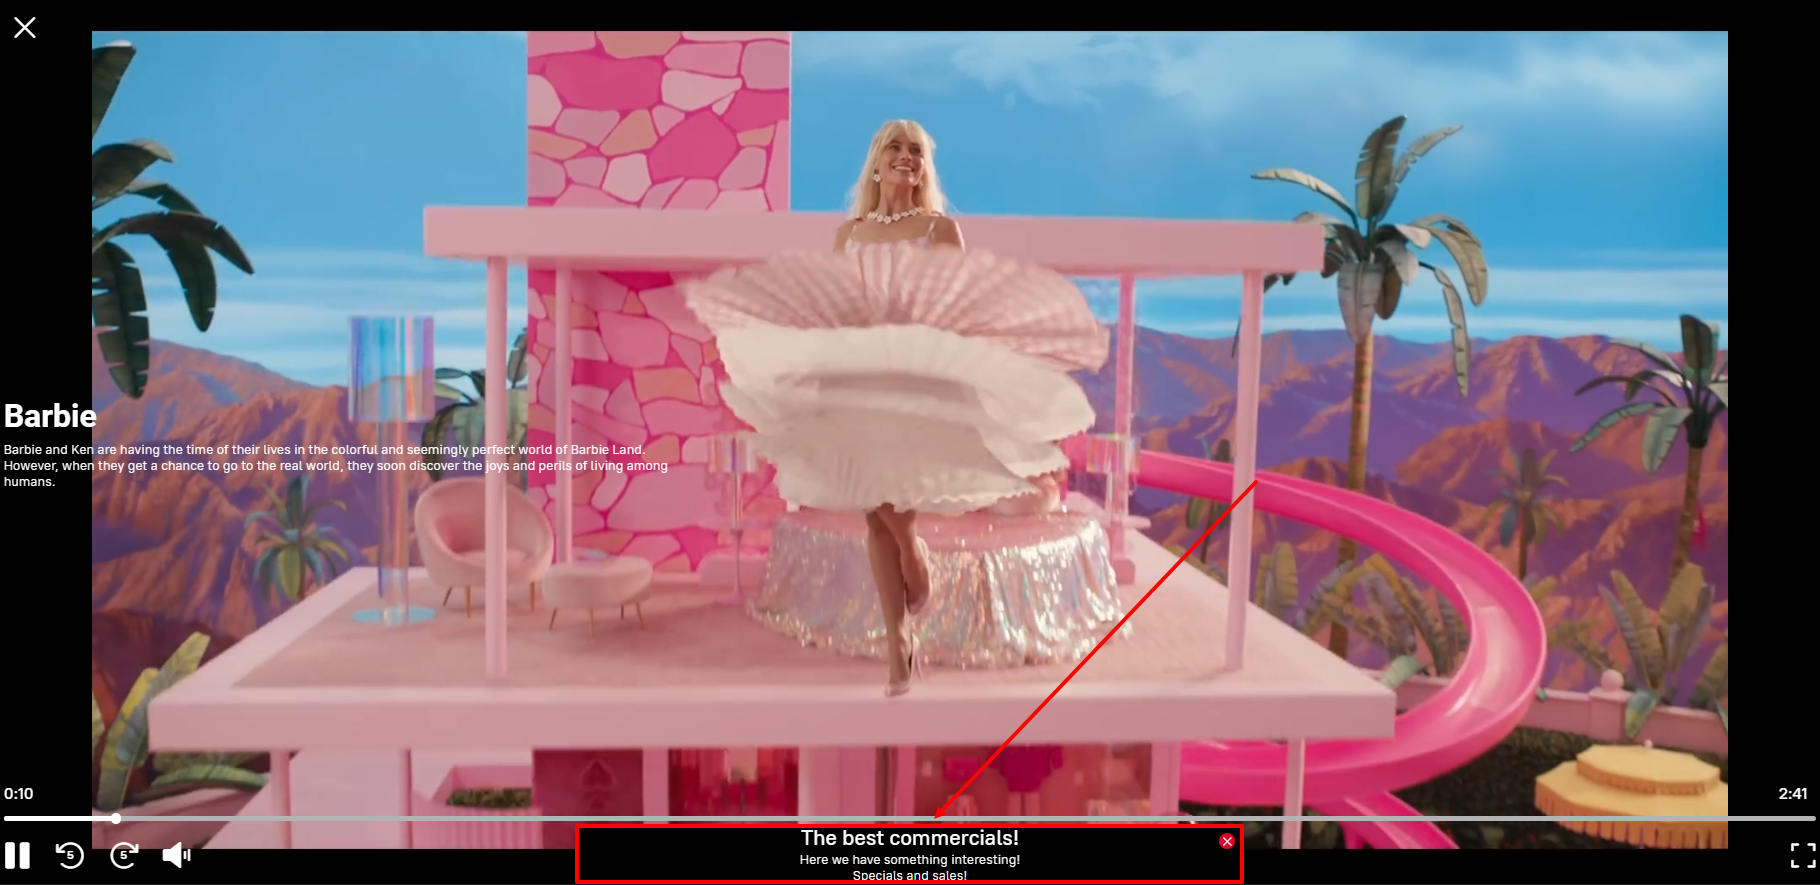
In the player, the banner (image) is located under the video and may look like this (depends on the user's device).
In the Add Commercials step, the fields for adding an image will open after selecting the "Image" commercial type.
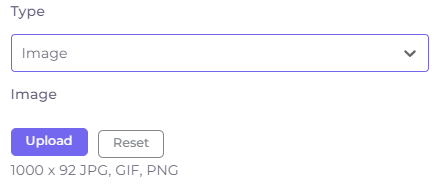
Click the appropriate button  to upload the image.
To edit an image, click on the action menu to the right of the commercial and select the appropriate option:
To delete an existing image, tap  .
.
To replace the image, press . The uploaded image will delete the previous image.
Adding and Editing Text Commercials
In the player, text commercials are placed below the video and may look something like this (depends on the user's device).
In the Add Commercials step, the fields for adding text will open after selecting the "Text" commercial type.
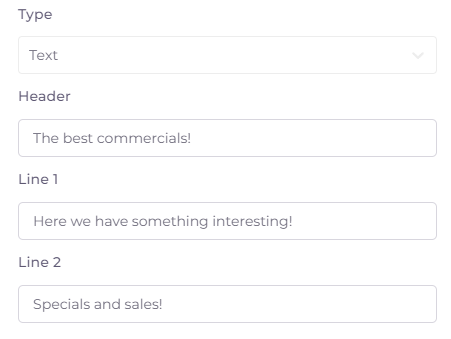
Header - the title slogan of the commercial.
Line 1 - the first line of the commercial.
Line 2 - the second line of the commercial.
To edit an existing text commercial, click on the action menu to the right of the commercial and select the appropriate item:
Commercials availability settings
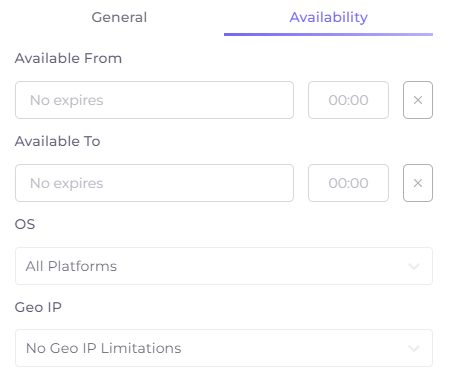
On the “Availability” tab in the Add/Edit Ads window, you can customize the parameters of commercial's availability by date and time.
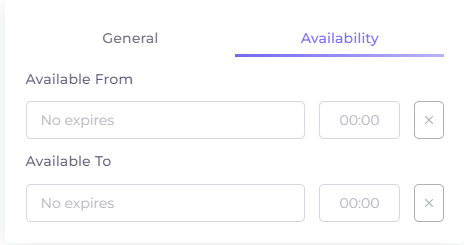
Available From - the date and time the commercial was launched.
Available To - date and time when the commercial stops being published.
To delete the contents of the date and time line, click on the cross to the right of it: