Channel Source Settings
To add a new source, go to the Edit Channel window or click "Save & Add Media Streams" in the Create Channel window and fill in the following fields.
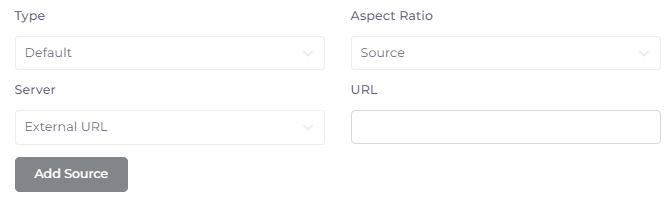
- Channel type: Default or Live (their features will be described below).
- Aspect Ratio: default as in the source, but can be adjusted to the screen size in the subscriber's application: Fit, Stretch or Crop.
Source - does not apply any settings.
Fit - fits existing content into the screen at its maximum length. The video proportions are preserved, the video is not cropped. Free space is filled with black color.
Stretch - stretches the image to fit the screen. Video proportions are changed, the video is not cropped.
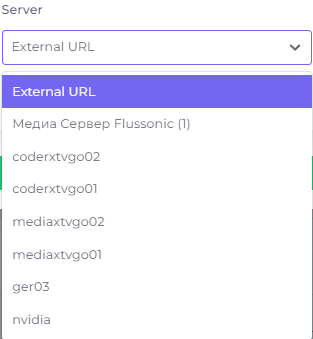
Crop - Fits the image to the shortest length. Video proportions are preserved, excessive video information is cropped. - Server - Selects the server on which the content resides. Servers are configured in the operator menu under “Plugins” (If you are using a direct link as a source, select “External URL”).
- URL - direct link to the content source (do not need to fill in if you are using a server as a source).
After filling in the fields, click  - the new source will be visible at the top of the window:
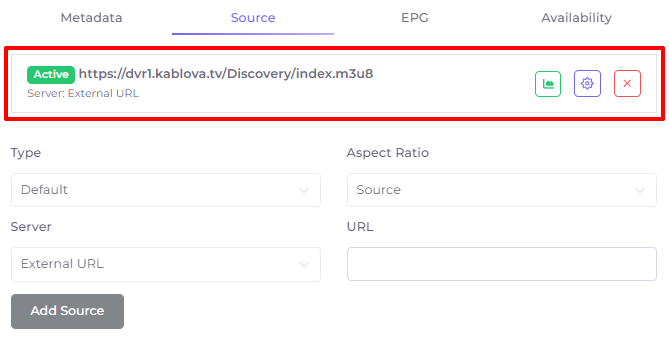
To delete a source, click the cross  to the right of it.
Channel Types
The default channel type is unicast. But a multicast type, which refers to a live channel type, can be used, too.
“Live” can be used in several cases:
- for multicast streams to save traffic when subscribers join;
- for unicast streams that need to be played with a higher priority than other sources of this channel.
The player will use the “Live” link if the user is not watching the archive, but is watching the live stream itself.
As soon as the user pauses or switches to the archive part of the broadcast, the player will use the “Default” link, which leads to the server with the archive.
You can create several links of different types.
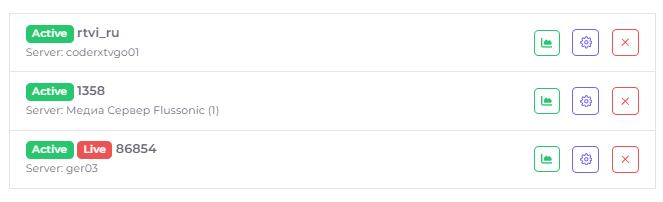
This is necessary for redundancy. In case the first Live link is unavailable (the server is down), the player will continue playing using the second Live link. Similarly with links of the “Default” type.
The player will use the links in order. Their order can be changed by dragging and dropping the rows.
If several sources are specified for a channel and one of them is of “Live” type, it will be used in the player with a higher priority than the “default” sources.
Add source from server
To add a source from the server, an external plugin must be installed in the "Plugins" section. After that you will be able to specify the server in the corresponding window:
After selecting the server, you will need to fill in the following fields (mandatory fields are marked with *).
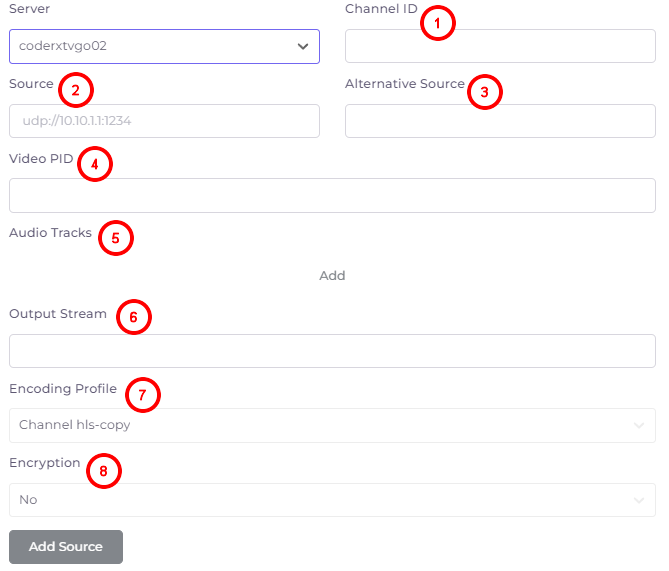
- Channel ID* - TV channel identifier, which is transmitted from the Middleware server to the server that performs stream encoding (transcoder). As a rule, the channel name written in capital Latin letters without spaces is used as an identifier.
- Source* - a direct link to the source on the server, for example: udp://192.168.1.100:5200 or http://124.94.23.15/channel1.m3u8).
- Alternative source - an additional link to the source, in case the main source is unavailable.
- Video PID - video identifier for transcoding (if more than one video is streamed).
- Audio tracks - add one or more audio tracks for the channel. To add an audio track, click “Add”. The Add Audio Track window will open.
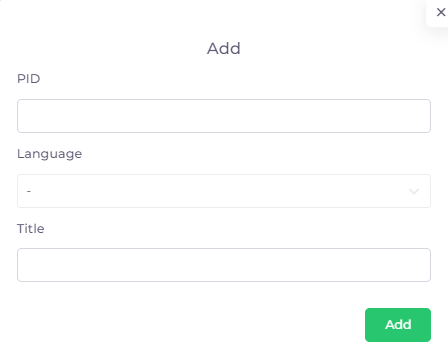
PID - audio identifier for transcoding.
Language - audio language.
Title - name of audio track to be displayed for subscribers (can, for example, correspond to the language name, if audio tracks of the channel in different languages are added). - Output Stream - URI parameter of the output stream at the encoder (only for udp broadcasting).
- Encoding profile - set of input stream transcoding parameters, set in encoder settings on plugins page.
- Encryption - source encryption mode.
Availability
Clicking on the created source settings button  accesses additional settings for source availability by time, geography, and platforms.
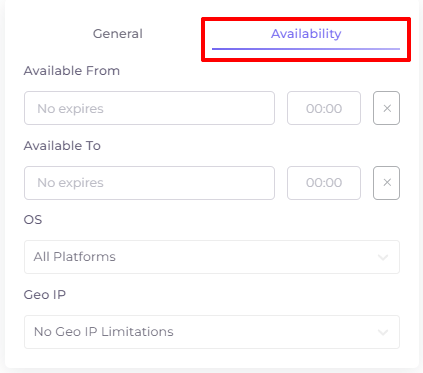
Available from - date and time of source activation (by default indefinitely);
Available To - date and time when the source activation ends (by default indefinitely);
OS - operating systems in which the source will be available;
Geo IP - selection of the geo-restriction rule. Rules are set in the operator menu.
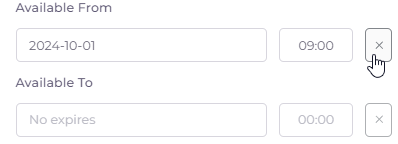
To delete the contents of the line with date and time, click on the cross to the right of it:
To save the settings, press 