Trailers
Trailers will be shown to subscribers on the movie (series, show) page regardless of whether the content is purchased or not. One item of content may contain several trailers.
Adding a Trailer
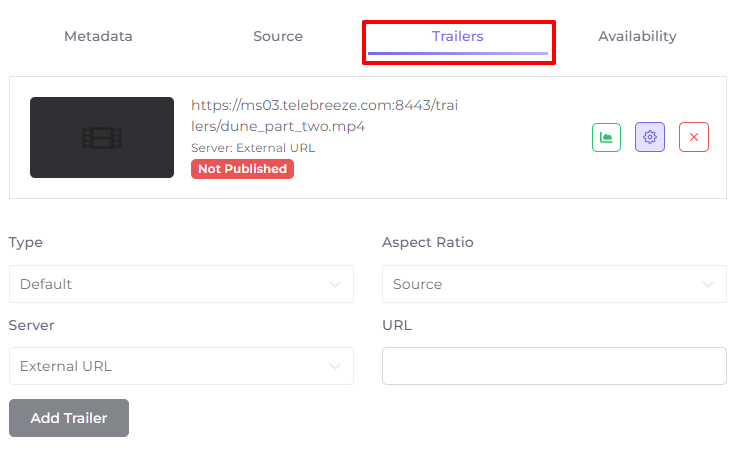
You can add trailers for videos, series and shows in the content editing window on the appropriate tab.
Aspect Ratio: defaults to source, but can be adjusted to fit the screen size in the subscriber's application: fit, stretch or crop.
Source - does not apply any settings.
Fit - fits existing content into the screen at its maximum length. The video proportions are preserved, the video is not cropped. Free space is filled with black color.
Stretch - stretches the image to fit the screen. Video proportions are changed, the video is not cropped.
Crop - Fits the image to the shortest length. Video proportions are preserved, excessive video information is cropped.
Server: select the server where the content is hosted. Once the server is selected, you will be prompted to select an Encoding profile. A URI (resource identifier) window will be added. It should be filled in automatically.

To add a file, click or drag a file to the Add File field:

To add a direct link to the trailer, leave the "Server" field with the content "External URL" and fill in the URL field. Click  - and it will appear as a block above the fields of adding a trailer.
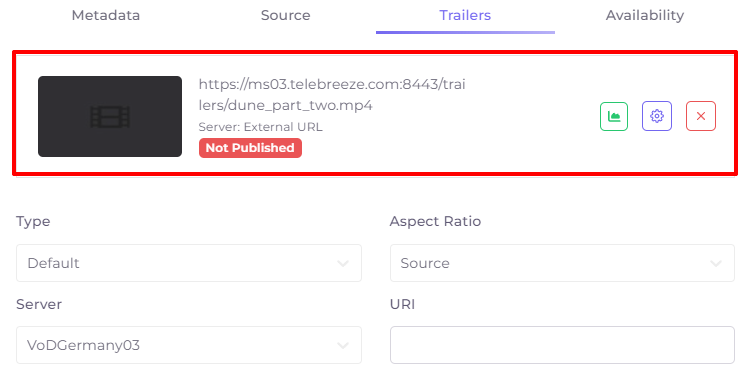
To delete a trailer, click on the cross  to the right of it.
Trailer settings
An added trailer is in “Not Published” status by default, so it is not visible to users. By clicking on the gear button  to the right of the trailer, you can go to its settings.
The settings window consists of three tabs: General, Subtitles and Availability.
General trailer settings
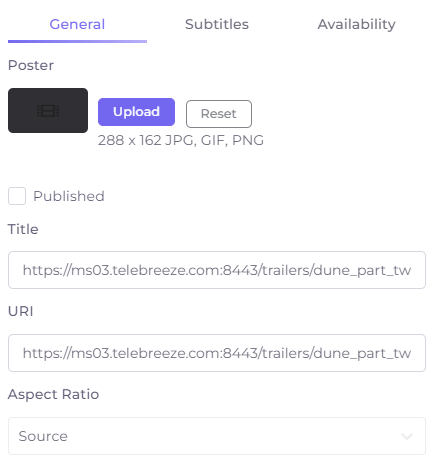
- Trailer poster to be shown in the subscriber's applications. Use the Reset button to clear the picture in the edit window.
- Published - this checkbox allows you to start publishing the trailer.
- The title of the trailer that will be visible to subscribers.
- URI - resource identifier, should be filled in automatically.
- Aspect ratio when viewing the trailer: by default as in the source, but can be adjusted to fit the screen size in the subscriber's application: fit, stretch or crop.
Source - does not apply any settings.
Fit - fits existing content into the screen at its maximum length. The video proportions are preserved, the video is not cropped. Free space is filled with black color.
Stretch - stretches the image to fit the screen. Video proportions are changed, the video is not cropped.
Crop - Fits the image to the shortest length. Video proportions are preserved, excessive video information is cropped.
Trailer Subtitles
You can customize the subtitle of a trailer for a video, series, or show by clicking on the content icon, then on the "Trailer" tab, the trailer settings button , and the "Subtitles" tab.
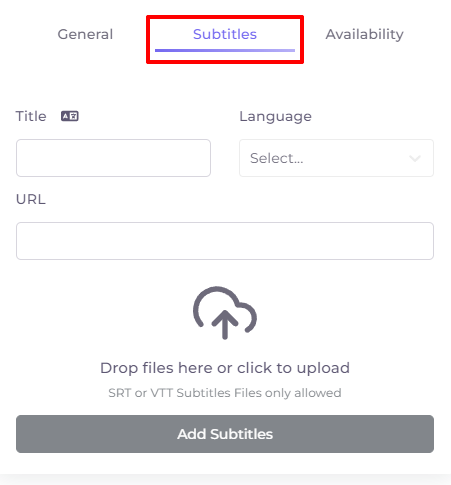
Title - subtitle title visible to users. Above the title window there is a localization button  , by clicking on which you can add a title in another language.
Language - subtitle language.
URL - link to the subtitle file. You can specify the link, or add the file itself below:
Only SRT and VTT subtitle files are allowed!
Once the subtitle file is added, it will be visible at the top of the window:
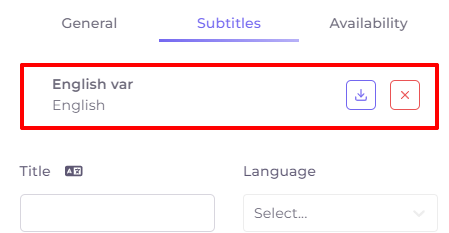
To the right of the added file there is a button for downloading  and deleting the file.
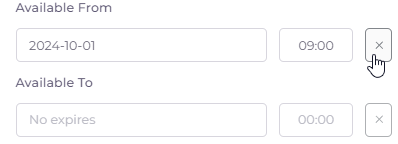
Trailer Availability
In the trailer settings, you can specify additional trailer availability options.
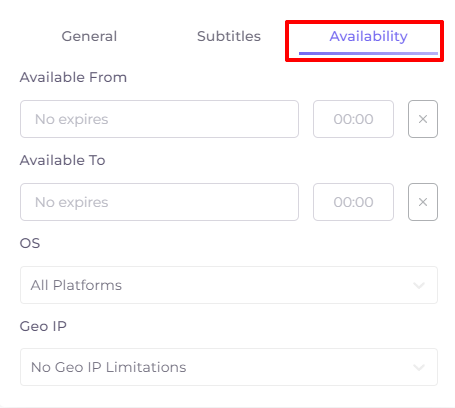
Available from - the date and time the trailer starts showing (the default is indefinite);
Available To - date and time when the trailer will end (the default is indefinite);
OS - operating systems in which the trailer will be available;
Geo IP - selection of geo-restriction rule. Rules are set in the operator menu.
To delete the contents of the date and time line, click on the cross to the right of it: